Monday, December 2, 2013

Japanese Notan's

In our first few classes of the school year we spent our time reviewing art room procedures and expectations. Exciting I know! The upper elementary and middle school school students created a name  tag for their introduction assignment. I asked that they tell me a little about themselves in each space. They were able to color their tag in with any media of their choice. The students also filled out questioner about their knowledge and interest in the visual arts thus far. 

Middle school then began the year studying Japenese Notan's.

"Notan" is the term used by the Japanese to express "light-dark" as an element of design. We understand this term as positive space and negative space, dividing the idea of light-dark into separate components. On paper it is easy to see that dark shapes cannot exist without a surrounding area of white. White shapes cannot exist without dark to define it. The two elements are really one, they complete one another. The Eastern culture from which Notan arose, seeks a more balanced view of the world. The classic yin/yang symbol is a reflection of this desire for balance.

After looking at a short  PowerPoint presentation the students created a design from a five inch square paper. The trick was for every object they cut, they had to flip the piece to mirror the blank piece it came from. Here are some of our finished examples. 


Color in Review

October was a busy month here at school. Most of our upper elementary and middle school students were MEAPing regularly. I was asked to help monitor our students while they were testing. Some of our art classes were cancelled during the process. When I was able to see my Kindergarten kiddo's again we were in the middle of studying all aspects of color. Just like our other Elements of Art I want the students to gain an understanding of color early on, so that we are able expand on our knowledge every year. What I did not know is how much prior knowledge each student brought to the discussion before the lesson began! 

Below are the photo's of the work the students have produced during our color exploration.

I started out by asking which colors on the color wheel were the primary colors, red, yellow, blue and which were the secondary, green, orange, purple. I then continued by asking which two colors create green, orange, and purple when mixed together. They all did very well. To explore color mixing first hand the students were able to choose a color combination. With the help of our teacher assistant and parent volunteer we squirted a very liquid  mixture of paint on their paper. The students then blew the paint through a straw around the paper and watched the process come together. The following week we  took our blobs and turned them into friendly creatures. The students added eyes, a nose, mouths, and limbs to their creature. They were also asked to give their creature a job, or the job they aspired to be when they grow up! A simple sentence was added to their paper, along with objects that related to their monsters profession!


This monster is a scientist! Complete with a purple potion and bubbles!


A building monster ready with a hard hat and belt. 

Completing our color wheel / color discussion I took the opportunity to quiz the students on everything they have studied in art so far. A big part of our time together in art is focused on the ability to follow a set of directions and review their core curriculum material with a creative twist. 

We sectioned our color wheels off into six sections. With a black crayon I asked the students to complete each of the following in a different space.

1. Different examples of lines
2. Geometric Shapes
3. Organic Shapes
4. An example of a pattern
5. Practice writing their first name
6. Writing the numbers one through ten.

For each space I did not show them examples on their white board.


Jack's Holiday Tile Contest

Early this November the kindergarten through forth grade students participated in a really cool community contest. Jack's Restaurant here in Spring Lake gave each participating elementary school a ceiling tile to paint. Restaurant guests are voting for their favorite this December. In my opinion we have a very unique idea, I hope we do well! In honor of our great state we painted our tile to look like a little Michigan Mitten! Can you tell? As the kid's art teacher it was special project for me especially to build relationships and bonds with each of the students who helped. We have some talented, smart, unique, and, caring kids. I am so lucky to be apart of such a special school so early in my career. OK. I will step off my praise soap box! Parents, you have every right to be very proud of your young ones.


Tuesday, October 15, 2013

I want gumballs!

Are you hungry for some sweet art? 

Last week in Children's House we were inspired by the work of Wayne Thiebaud. Wayne is an American painter still working in California. Wayne has always be inspired by sweets. When asked about his work he once said,

"My subject matter was a genuine sort of experience that came out of my life, particularly the American world in which I was privileged to be. I would really think of the bakery counters, of the way the counter was lit, where the pies were placed, but I wanted just a piece of the experience. From when I worked in restaurants. It was always poetic to me."


Wayne Thiebaud. Three Machines. 1963. oil on canvas.30 x 36 1/2 in.


Before starting our own art I asked the students, Based on your life experiences so far what would you paint most often?

To wrap up our discussion on shapes I  started by displaying a gumball machine. The little ones were quick to describe the shapes that made up the machine. Together we drew a large circle to hold our treats. We then connected a square or a rectangle for our base, added the coin slot, twist knob, and topped it off with the square top. 

As am artist myself, I believe that all students should be exposed to real objects as much as possible when drawing from observation. 

See our work below for a sweet treat!


Monday, September 30, 2013

So many circles

I am tickled to display the finished circle collages. The young artists in the children's house classroom did a fabulous  job, giving their best effort to a challenging repetition procedure work of art. 


This coming week we will follow up this lesson with an artist study on the very yummy work of Wayne Thiebaud. 

Henri Matisse Collage

First grade has spent the last two weeks studying the life and artwork of a well known french artist, Henri Matisse. 
He would then cut beautiful, organic, free-flowing shapes with scissors. He rarely threw away any scraps.

When Matisse was nearly seventy-two years old, he became ill and it was difficult for him to stand and paint. His illness did not restrict his creativity. He began a new technique, which he called, "painting with scissors", which was painting large sheets of paper with different colors using gouache, an opaque watercolor.
Snow Flowers, 1951

He would then cut beautiful, organic, free-flowing shapes with scissors. He rarely threw away any scraps.

The first graders focused on organic and geometric shapes, and fine motor hand development in cutting out each shapes. Check out our fantastic examples below.


Beautiful example of organic shapes


Lovely composition


Well planned out and neat

Exploding Boxes

Third grade was challenged by one of my most favorite problem solving art lessons. After discussing lines in our first class we moved right along to Space. 

As artists it is easy to concentrate on the main objects of a particular art piece or the positive space. Negative Space is the space between an object, around an object, and the opposite of an identifiable object. Negative space can be used to help define boundaries of positive space in any given piece of art. 

This lesson is a highly valuable lesson in the art curriculum. Through the positive negative space puzzle students will be engaged in a problem solving art lesson discovering the difference between the two areas within the picture plane. This lesson calls for students to use their prior knowledge of warm and cool colors as well as geometric and organic shapes to create a unique design puzzle. As a teacher it was enjoyable to watch the students design each shape and figure out how to place each piece correctly as a mirror image.


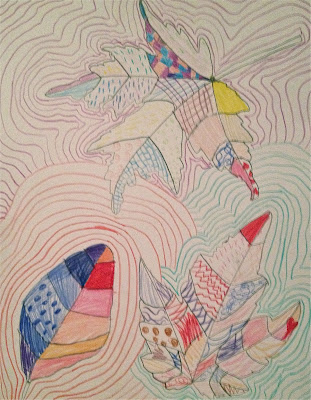
Leaf Lines

The early elementary classes have started the school year studying the Elements of Art and Principles of Design. Our first project was centered around studying lines as well as patterns.

In our first meeting the students collected three leaves outside on the school grounds. They were then asked to trace the leaves, add outlines up to the edge of the paper, and patterns on the inside of the leaves. This was a great design lesson to get to know the student individually. From this lesson I was able to understand their art background, how they handle the materials and care of their own work. I'm really excited to spend the year with this talented ground of young artists!


Sunday, September 22, 2013

Lines that Walk

Children's House entered the room with a twisty line only to wonder what will we discuss during our first art class? Lines! For the start of the school year we will be studying the Elements of Art, concentrating on one element at time. Lessons will be creative, individualized, challenging, and focus on skills that promote fine motor development. 


Upon entering the room we discussed the many different types of lines. (Straight, curvy, zig zag, loopy, vertical, horizontal...) The children were asked to use their pointer finger to practice drawing examples in the air before beginning. Each student was then provided with the opportunity to draw each line discussed on their paper. The line could be placed anywhere on the paper as long as it ran from edge to edge. Lastly we designed the shapes with patterns and color.


Next we will be exploring shapes. Starting with circles, we will practice tracing, cutting and glueing. Stay tuned!

-Krista 

Welcome!

Hello! Thank you so much for stopping by to check out all of the happenings in the art room. Exciting things will soon be developing and I can not wait to share them with you! Please check back weekly to share in our work in progress as well as our fabulous masterpieces! Each grade level will have its own link for easy access.

To the families of the Walden Green students I hope to meet each and everyone of you very soon. If you happen to see me in the building please say hello!

-Krista

Monday, December 2, 2013

Japanese Notan's

In our first few classes of the school year we spent our time reviewing art room procedures and expectations. Exciting I know! The upper elementary and middle school school students created a name  tag for their introduction assignment. I asked that they tell me a little about themselves in each space. They were able to color their tag in with any media of their choice. The students also filled out questioner about their knowledge and interest in the visual arts thus far. 

Middle school then began the year studying Japenese Notan's.

"Notan" is the term used by the Japanese to express "light-dark" as an element of design. We understand this term as positive space and negative space, dividing the idea of light-dark into separate components. On paper it is easy to see that dark shapes cannot exist without a surrounding area of white. White shapes cannot exist without dark to define it. The two elements are really one, they complete one another. The Eastern culture from which Notan arose, seeks a more balanced view of the world. The classic yin/yang symbol is a reflection of this desire for balance.

After looking at a short  PowerPoint presentation the students created a design from a five inch square paper. The trick was for every object they cut, they had to flip the piece to mirror the blank piece it came from. Here are some of our finished examples. 


Color in Review

October was a busy month here at school. Most of our upper elementary and middle school students were MEAPing regularly. I was asked to help monitor our students while they were testing. Some of our art classes were cancelled during the process. When I was able to see my Kindergarten kiddo's again we were in the middle of studying all aspects of color. Just like our other Elements of Art I want the students to gain an understanding of color early on, so that we are able expand on our knowledge every year. What I did not know is how much prior knowledge each student brought to the discussion before the lesson began! 

Below are the photo's of the work the students have produced during our color exploration.

I started out by asking which colors on the color wheel were the primary colors, red, yellow, blue and which were the secondary, green, orange, purple. I then continued by asking which two colors create green, orange, and purple when mixed together. They all did very well. To explore color mixing first hand the students were able to choose a color combination. With the help of our teacher assistant and parent volunteer we squirted a very liquid  mixture of paint on their paper. The students then blew the paint through a straw around the paper and watched the process come together. The following week we  took our blobs and turned them into friendly creatures. The students added eyes, a nose, mouths, and limbs to their creature. They were also asked to give their creature a job, or the job they aspired to be when they grow up! A simple sentence was added to their paper, along with objects that related to their monsters profession!


This monster is a scientist! Complete with a purple potion and bubbles!


A building monster ready with a hard hat and belt. 

Completing our color wheel / color discussion I took the opportunity to quiz the students on everything they have studied in art so far. A big part of our time together in art is focused on the ability to follow a set of directions and review their core curriculum material with a creative twist. 

We sectioned our color wheels off into six sections. With a black crayon I asked the students to complete each of the following in a different space.

1. Different examples of lines
2. Geometric Shapes
3. Organic Shapes
4. An example of a pattern
5. Practice writing their first name
6. Writing the numbers one through ten.

For each space I did not show them examples on their white board.


Jack's Holiday Tile Contest

Early this November the kindergarten through forth grade students participated in a really cool community contest. Jack's Restaurant here in Spring Lake gave each participating elementary school a ceiling tile to paint. Restaurant guests are voting for their favorite this December. In my opinion we have a very unique idea, I hope we do well! In honor of our great state we painted our tile to look like a little Michigan Mitten! Can you tell? As the kid's art teacher it was special project for me especially to build relationships and bonds with each of the students who helped. We have some talented, smart, unique, and, caring kids. I am so lucky to be apart of such a special school so early in my career. OK. I will step off my praise soap box! Parents, you have every right to be very proud of your young ones.


Tuesday, October 15, 2013

I want gumballs!

Are you hungry for some sweet art? 

Last week in Children's House we were inspired by the work of Wayne Thiebaud. Wayne is an American painter still working in California. Wayne has always be inspired by sweets. When asked about his work he once said,

"My subject matter was a genuine sort of experience that came out of my life, particularly the American world in which I was privileged to be. I would really think of the bakery counters, of the way the counter was lit, where the pies were placed, but I wanted just a piece of the experience. From when I worked in restaurants. It was always poetic to me."


Wayne Thiebaud. Three Machines. 1963. oil on canvas.30 x 36 1/2 in.


Before starting our own art I asked the students, Based on your life experiences so far what would you paint most often?

To wrap up our discussion on shapes I  started by displaying a gumball machine. The little ones were quick to describe the shapes that made up the machine. Together we drew a large circle to hold our treats. We then connected a square or a rectangle for our base, added the coin slot, twist knob, and topped it off with the square top. 

As am artist myself, I believe that all students should be exposed to real objects as much as possible when drawing from observation. 

See our work below for a sweet treat!


Monday, September 30, 2013

So many circles

I am tickled to display the finished circle collages. The young artists in the children's house classroom did a fabulous  job, giving their best effort to a challenging repetition procedure work of art. 


This coming week we will follow up this lesson with an artist study on the very yummy work of Wayne Thiebaud. 

Henri Matisse Collage

First grade has spent the last two weeks studying the life and artwork of a well known french artist, Henri Matisse. 
He would then cut beautiful, organic, free-flowing shapes with scissors. He rarely threw away any scraps.

When Matisse was nearly seventy-two years old, he became ill and it was difficult for him to stand and paint. His illness did not restrict his creativity. He began a new technique, which he called, "painting with scissors", which was painting large sheets of paper with different colors using gouache, an opaque watercolor.
Snow Flowers, 1951

He would then cut beautiful, organic, free-flowing shapes with scissors. He rarely threw away any scraps.

The first graders focused on organic and geometric shapes, and fine motor hand development in cutting out each shapes. Check out our fantastic examples below.


Beautiful example of organic shapes


Lovely composition


Well planned out and neat

Exploding Boxes

Third grade was challenged by one of my most favorite problem solving art lessons. After discussing lines in our first class we moved right along to Space. 

As artists it is easy to concentrate on the main objects of a particular art piece or the positive space. Negative Space is the space between an object, around an object, and the opposite of an identifiable object. Negative space can be used to help define boundaries of positive space in any given piece of art. 

This lesson is a highly valuable lesson in the art curriculum. Through the positive negative space puzzle students will be engaged in a problem solving art lesson discovering the difference between the two areas within the picture plane. This lesson calls for students to use their prior knowledge of warm and cool colors as well as geometric and organic shapes to create a unique design puzzle. As a teacher it was enjoyable to watch the students design each shape and figure out how to place each piece correctly as a mirror image.


Leaf Lines

The early elementary classes have started the school year studying the Elements of Art and Principles of Design. Our first project was centered around studying lines as well as patterns.

In our first meeting the students collected three leaves outside on the school grounds. They were then asked to trace the leaves, add outlines up to the edge of the paper, and patterns on the inside of the leaves. This was a great design lesson to get to know the student individually. From this lesson I was able to understand their art background, how they handle the materials and care of their own work. I'm really excited to spend the year with this talented ground of young artists!


Sunday, September 22, 2013

Lines that Walk

Children's House entered the room with a twisty line only to wonder what will we discuss during our first art class? Lines! For the start of the school year we will be studying the Elements of Art, concentrating on one element at time. Lessons will be creative, individualized, challenging, and focus on skills that promote fine motor development. 


Upon entering the room we discussed the many different types of lines. (Straight, curvy, zig zag, loopy, vertical, horizontal...) The children were asked to use their pointer finger to practice drawing examples in the air before beginning. Each student was then provided with the opportunity to draw each line discussed on their paper. The line could be placed anywhere on the paper as long as it ran from edge to edge. Lastly we designed the shapes with patterns and color.


Next we will be exploring shapes. Starting with circles, we will practice tracing, cutting and glueing. Stay tuned!

-Krista 

Welcome!

Hello! Thank you so much for stopping by to check out all of the happenings in the art room. Exciting things will soon be developing and I can not wait to share them with you! Please check back weekly to share in our work in progress as well as our fabulous masterpieces! Each grade level will have its own link for easy access.

To the families of the Walden Green students I hope to meet each and everyone of you very soon. If you happen to see me in the building please say hello!

-Krista

.